Git for Makers | Guides

Many makers use software or 3D models as part of their projects and need a safe way to store those files and share them with others. Git is a great tool for this and is used by many makers and developers around the world. Let’s take a look at how the basics
Image credit: Git
What is Git?
Git is software that allows us to track changes to files and folders. It is used by many developers and makers around the world to store their code and share it with others.
This type of software is known as a version control system and is the standard approach to working collaboratively in the software development industry.
A project location is called a repository or repo. You’ll see that mentioned a lot.
What is GitHub?
GitHub is a website that allows us to host our git repositories online. It is a great way to share our code with others and to collaborate on projects. It also allows additional functionality, such as sharing and reviewing code.
Not to get too technical, but you don’t need to use GitHub in order to use git. You can think of GitHub as an add-on that facilitates the online storage and sharing of your repositories. If you wanted to you could create a repository on your local machine, but GitHub makes the creation and sharing of repositories much easier.
Are there other platforms like GitHub?
Yes! There are many competing services that offer similar functionality. The most popular are:
There are also other version control systems besides git! You can assess the features and benefits yourself to determine which you’d prefer to use. For this guide we’ll be using GitHub.
How do I get started?
Create a GitHub account
First you’ll need to create a GitHub account. You can do that here
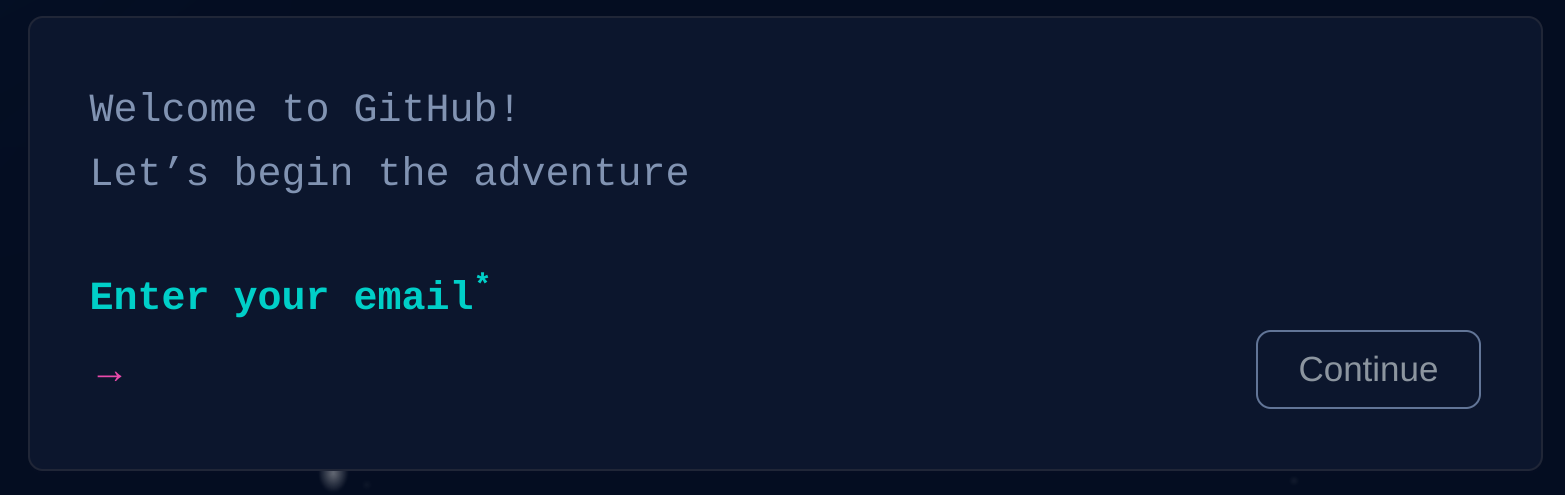
The website will guide you through the process of creating an account. Choose your username carefully as it will be visible to other users.
Create a repository
Once you’ve created your account you’ll need to create a repository. This is where you’ll store your files.
Use this option if you want to create a new repository from scratch to store files for your project.
In the top right corner of the GitHub website you’ll see a + icon. Click this and then select New repository. Enter a name, this will be visible by other users. You can also add a description if you like.
Contributing to an existing repository
Another approach to working with Git is to be invited to join an existing repository.
This allows you to make changes to the repository and then submit those changes to the owner of the repository for review and approval.
Often this is for teams working together with equal access. For example, a team of developers working on a software project.
Creating a copy of an existing repository
If you aren’t authorised to work on an existing repository and want to create a copy, you can do that by clicking the Fork button on the repository page. This creates a copy of their repository (including any change history) in your account, which you can then edit and make changes to.
From this point forward, the repository is yours and you can make any changes you like. You can also submit a Pull Request to the original repository owner to request that they merge your changes into their repository (see below).
This is a great way to contribute to open source projects and to share your changes with others, as you can work independently and choose which changes are merged into the original repository (if any).
What is a Pull Request?
In GitHub, a Pull Request is a request to merge changes from one repository into another. This is typically used when you want to merge changes from a forked repository into the original repository.
They are also used in a repository to merge changes between branches.
And what are branches?
I know, it’s getting a little complicated, but bear with me. Branches are just a way to organise your code. You can think of them as folders that contain a specific version your code.
Typically a developer will create a new branch from the main branch (often called develop, main or master), this effectively copies all the files and the change history into a new ‘folder’. They can then make changes to the code in that branch without affecting the main branch.
Anything you do in a branch is isolated from anyone else’s changes, so it’s safe. You can delete the branch if you want to delete your changes, or you can request that your changes be pulled into the main branch (a ‘pull request’, see?).
Branches are typically used so that developers can work on a feature in isolation, then merge that feature to the main code when it’s finished (or at least finished enough!).
The advantage is that a team can work on multiple features at once, so you could have branches for feature 1, feature 2 and feature 3 and each developer can work on their own feature without affecting the others. When they are finished they can merge their changes into the main branch.
What else do I need to know?
As far as the basics go, you’re nearly there.
Something you need to remember about Git and GitHub is that, as you’re working on your local machine, you need to push your changes to GitHub in order to sync them with the website. This is a good habit to get into, as it means that your changes are backed up and you can easily share them with others.
You’ll see mentions of ‘committing’ changes and ‘pushing’ them. That’s all this means. If you commit a change to a branch, that change is saved to your local copy of the repository. Pushing the change then syncs that change to GitHub.
Similarly, you may find that you need to ‘pull’ changes from GitHub if you have other contributors making changes on the branch. This makes sure you have their changes on your local machine.
Is it safe?
If you create a private repository, the contents won’t be accessible to anyone unless you give them access (one of the great features that GitHub offers) If you create a public repository, anyone can see the contents.
In either case, it’s bad practice to include any secrets in your repository, this means passwords or other sensitive information, you should make sure you’re not storing them in your repository so they don’t get shared with others.
Let’s go!
GitHub Desktop
The GitHub Desktop app is a great way to get started with git. It’s a graphical interface that makes it easy to create and manage repositories. You can download it here.
The official guide will take you through the steps below using GitHub Desktop:
- Installing the app
- Signing in to GitHub
- Creating a new repo or cloning a repo (see above)
- Making changes in a branch
- Collaborating
- Syncing your changes
Using the CLI
Many seasoned developers (including myself) like to use the command line interface (CLI) to interact with git. This is a great way to learn the basics and to get a feel for how git works. It also means you can work with git quickly an easily once you get used to the commands.
You don’t need GitHub Desktop installed to use the CLI, but you will need git and a GitHub account.
This is a little more complicated than I want to cover in this article, but if you’re comfortable with getting set up yourself, I’ve added some examples in a table below of how to use the CLI with GitHub.
| Command | Description | Example |
|---|---|---|
git init | Initialise a new git repository locally (an alternative to using GitHub) | git init |
git clone | Clone an existing repository | git clone https://github.com/dmt-labs/modular-biped.git |
git add | Add files to the staging area | git add --all |
git commit | Commit changes to the local repository | git commit -m "My commit message" |
git push | Push changes to the remote repository | git push |
git pull | Pull changes from the remote repository | git pull |
git branch | Create a new branch | git branch my-new-branch |
git checkout | Switch to a different branch | git checkout my-new-branch |
git merge | Merge changes from one branch into another | git merge my-new-branch |
git status | View the status of the changes locally | git status |
git log | View the commit history | git log |
FAQ
There are quite a few quirks you’ll need to know about using Git and GitHub. I’ll add some of my most common questions here.
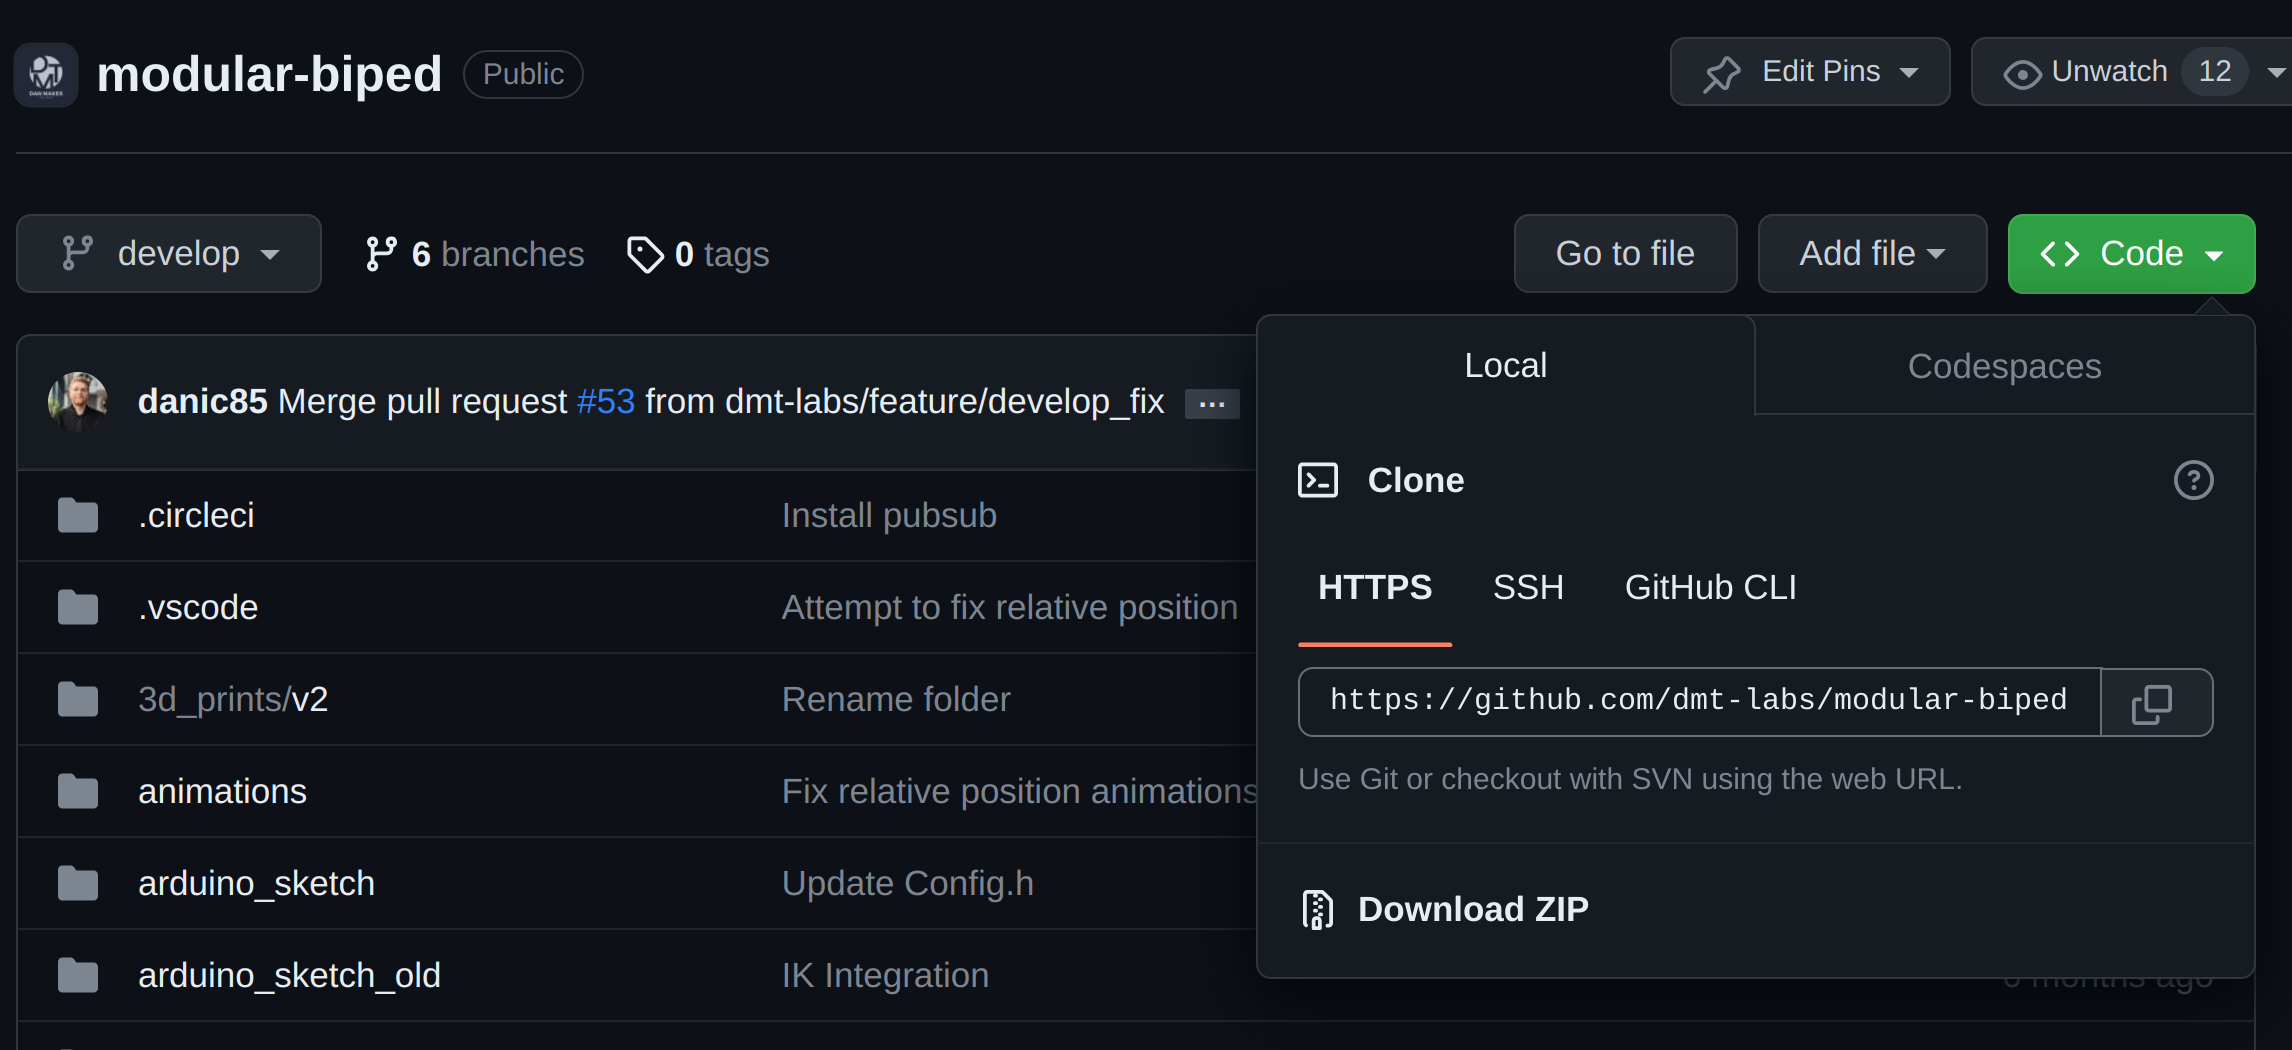
Where do I find the URL to clone a repository?
You can find the URL to clone a repository by clicking the green Code button on the repository page. This will open a menu where you can copy the URL. Enter that into your clone command and you’re good to go!
How do I add files to my repository?
You can add files to your repository by dragging them into the GitHub desktop app. You can also use the command line to add files to the staging area using the git add command.
If you’re using the command line you can use git add . to add all files in the current directory, or git add --all to add all untracked files in the repository. Similarly you can specify the file specifically with git add myfolder/file.txt if you want to have a little more control.
How often do I need to sync (pull and push changes)
The answer to this depends on how the repository is being used. If you’re the only person contributing then you’ll likely never need to pull changes, unless you’re pushing from multiple locations. If you’re working with others, you should pull whenever there are changes made that you want to include in your branch.
You should push your changes frequently, as this will ensure that your changes are backed up and you can easily share them with others.
What is a conflict and how do I resolve them?
A conflict occurs when two people make changes to the same file at the same time. Git will try to merge the changes automatically, but if it can’t it will ask you to resolve the conflict manually.
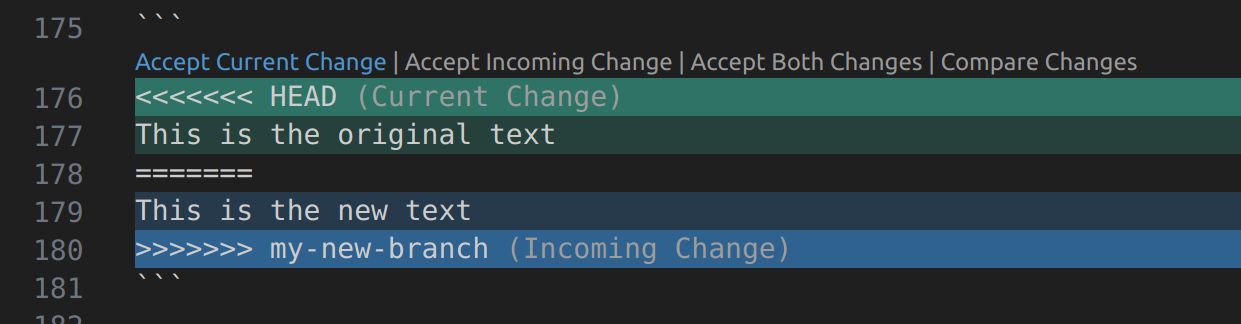
Usually that looks like this:
1
2
3
4
5
<<<<<<< HEAD
This is the original text
=======
This is the new text
>>>>>>> my-new-branch
The text between <<<<<<< HEAD and ======= is the original text, the text between ======= and >>>>>>> my-new-branch is the new text.
Note: Your editor may highlight this for you, and give you an option to accept the current or incoming change, or accept both.
You can choose which text you want to keep and then delete the other text and the conflict markers. Once you’ve done that you can commit the changes and push them to the remote repository.
When you’re working with others, you may find that you need to resolve conflicts often. This is normal and is part of the process of working collaboratively. Please PLEASE don’t just delete the other person’s changes in favour of your own. That’s now how you make friends.